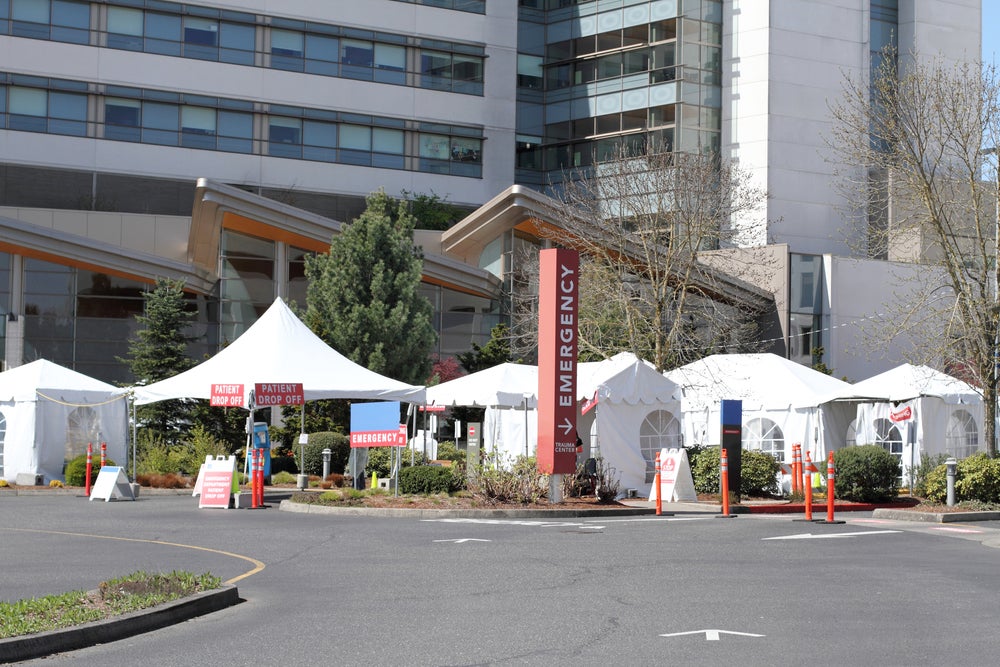
When you think of canopies, you probably picture events like carnivals, weddings, picnics, or trade shows. However, when used for medical purposes, canopy tents can be a lifesaver. Offering emergency relief for disaster victims or running vaccination drives, portable, inexpensive, and weatherproof canopies are excellent for temporary medical installations.
If you need to set up a medical tent with a canopy, here’s a step-by-step guide:
Select the Right Type of Canopy
Before you’re ready to set up, it’s important to consider which type of canopy fits your needs. A pop-up canopy tent is the easiest to set up and transport, making it a first choice for temporary setups. If you are looking to build a somewhat larger and more permanent base, a frame canopy tent may better suit your needs. Identify what works for you and invest in it.
Find a Safe Spot for Canopy
Now that you have your canopy, you need to find a place to set it up. Look for a place that is prominent; easy to identify and accessible. Stage your tent on smooth terrain, but for permanent installations, avoid a flat surface, as it would be prone to water stagnation if it rains. Instead, look for a slight slope that will provide sufficient drainage.
Your area of choice should be large enough to accommodate your tent and other items, such as banner stands, barriers, etc., you use to mark the tent. Find an area that is sheltered from the elements. Areas with foliage are ideal, as the soil will be firmer, and any surrounding vegetation will grant you shelter.
Spread Out, Then Stake Canopy
Once you’re ready to set up, start by spreading out the canopy flat on the ground with the top side up. This will give you a good estimate for the amount of space the canopy will occupy.
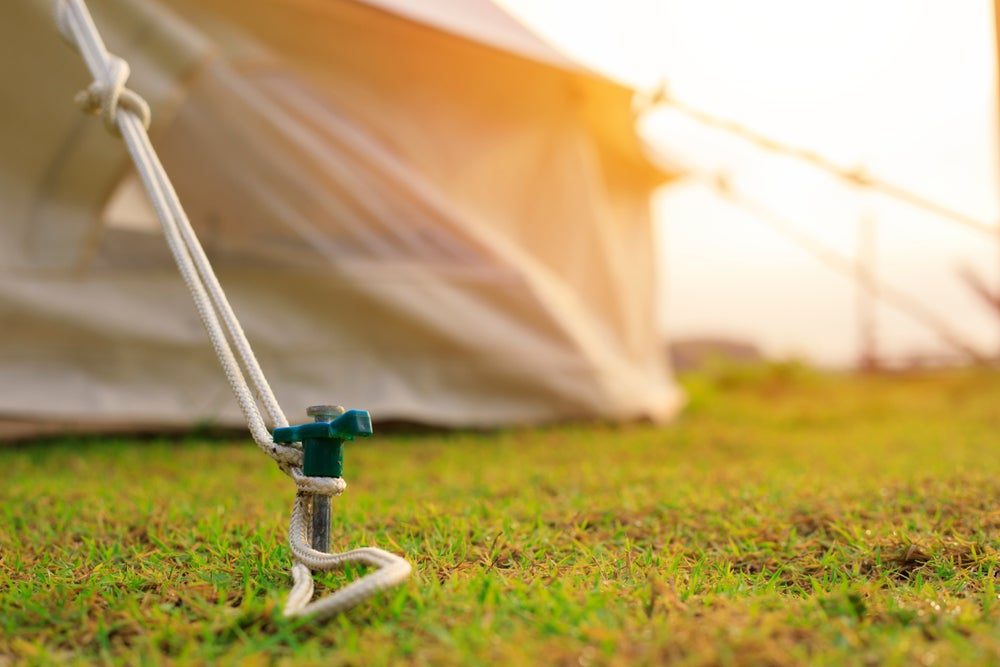
If you have stakes, place one of each in the ground near the poles. Maintain a distance of approximately four feet between the stakes and the tent’s edge. Make sure that the stakes are driven fully under the ground. Finally, loop the straps around each stake.
Insert the Poles
After you’ve staked the canopy, insert the corner and side poles in their respective holes. Then, gradually raise the poles so the lower section of each pole slants towards the middle of the canopy. When properly positioned, the canopy will be taut.
Tighten the straps as necessary and tie to ropes securely to the side and corner poles. Finally, raise the central pole by inserting it through the appropriate hole. Once it’s in an upright position, tie it to the canopy. You might need an extra pair of hands for this task.
Install and Secure
Now that your medical canopy tent is almost ready, take the time to ensure that all the ropes are tight and secured around the side poles. If you need to make adjustments, then raise the canopy. Adjust the tension at the top and double check every rope and strap to ensure everything is secure, then wrap out.
Once your main canopy is set, address any security concerns in the area. If needed, install barriers or bollards to protect the area from vehicles. Get rid of any combustibles placed around the tent and place fire extinguishers at entry points. Finally, place any generators at least 20 feet away from the setup, and ideally, enclose them with a fence.
Protect From the Weather
You should also plan for the weather to prevent the canopy tent from collapsing even if the conditions turn inclement. Make documentation for your plan and keep it at hand so that you can give clear orders to your team if the weather worsens.
As a general rule of thumb, ensure that the canopy is adequately anchored, braced, and roped against windy conditions. Take the time to install weatherproof side walls before any storms to keep out heavy winds, rain, and snow. Finally, if you’re using air ventilation, ensure that the air is pumped indirectly into the canopy, not the center.

 Posted in