Custom Vinyl Banners: Key Features
- Durable Material: Opt for 13 oz or a 16 oz PVC flex upgrade for better durability and UV resistance
- Vibrant Visual Quality: High-resolution printing at 720 DPI eco-solvent or 600 DPI UV printing
- Customizable Flexibility: Choose from custom or pre-defined sizes
- Enhanced Weather Protection: Optional lamination extends banner life
- Multiple Hanging Options: Various choices including grommets, adhesive tabs, and pole pockets
- Wind Resistant Design: Wind flaps enhance stability in windy conditions
Product Overview
Maximize Your Brand's Impact with Custom Vinyl Banners
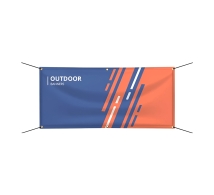
Discover the versatility and effectiveness of our custom vinyl banners. Designed for maximum visibility and durability, these banners are perfect for businesses looking to make a striking impression at any event or promotion. Ideal for both indoor and outdoor settings, our outdoor banners ensure your message stands out in any environment.
Superior Build Quality and Captivating Design Aesthetics
Our custom vinyl banners are crafted from premium quality PVC flex, which offers exceptional durability and weather resistance. Choose from a standard 13 oz graphic weight or upgrade to 16 oz for enhanced durability and UV resistance. For single-sided banners, the graphic front is in white and the back in gray, ensuring a professional appearance from any angle. Our advanced printing options include full-color, 720 DPI eco-solvent printing or 600 DPI UV printing, ensuring vibrant and long-lasting visuals.
Customizable Designs with Versatile Hanging Options
Select from pre-defined sizes or specify custom dimensions to suit your unique needs perfectly. Along with customizable designs, you have a range of hanging options to choose from, including ultra-strong adhesive tabs, various pole pockets, and brass grommets, all designed to simplify your display setup. For enhanced durability in windy conditions, consider adding wind flaps to maintain visibility and prevent damage. To further protect and extend the life of your banners, we recommend our lamination service, which shields against harsh weather and wear. Use our intuitive online design tool, upload your own artwork, or collaborate with our expert designers to tailor your high-quality large vinyl banners to your specific requirements. Also, we are offering high quality, eye-catching Breakaway Banners for sporting and promotional events.
Versatile Use and Easy Maintenance
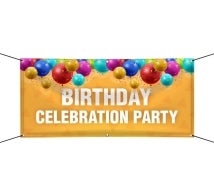
Our double-sided custom vinyl banners are perfect for any setting, from retail promotions to special events. They are designed to withstand the elements, making them suitable for both indoor and outdoor use. Maintenance is straightforward - simply wipe the banners with a soft, damp cloth to keep them looking fresh and vibrant. For large-scale promotions, take advantage of our bulk purchase discounts to receive a cost-effective advertising solution.
Uplift your promotional efforts with our affordable custom vinyl banners for business. Order today for hassle-free door-to-door delivery and see your brand visibility soar, whether it's for a store sale, grand opening, or trade show display.